
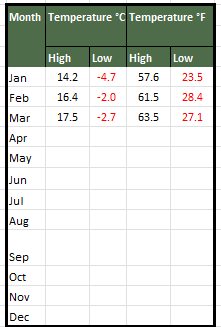
Sunday morning was dull, damp and drizzly but around lunchtime it began to brighten up and the afternoon wasn't too bad at all. Monday was much better with much more sunshine and the temperature up to a more respectable 23°C for the time of year.
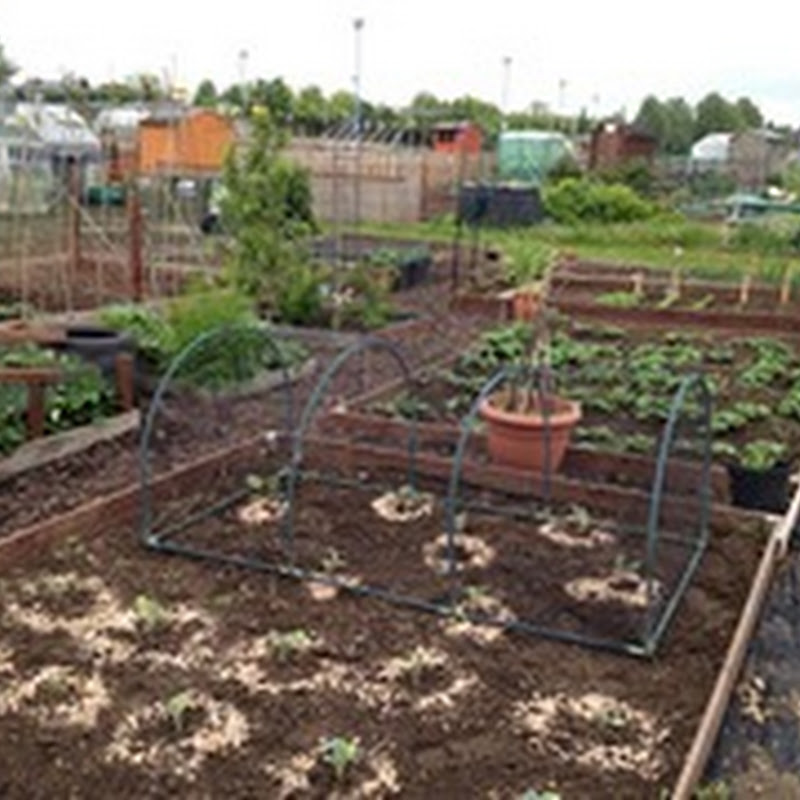
I decided to do a bit more work on our new coldframe courtyard. I thought it was about time to try and get our WoodBlocx raised bed constructed so that we could get some use out of it this summer.

I’d had a quick look through the instructions and been warned to make sure the dowels were inserted into the blocks on the countersunk side. One problem I anticipate is that I can't position the bed in its final position so some way or another it will have to be repositioned at a later date, probably next spring.
The instructions do recommend constructing the raised bed on a firm level surface to aid ease of construction. I was constructing ours on bark chippings so I had my doubts about how the raised bed would fit together. I gathered together the tools I thought would be needed. All fairly obvious apart from the saw needed to cut the dowels to fit the top capping layer.

The base was set out in accordance with layer 1 of the instructions and levelled up on the bark chippings. The dowels were hammered home into the appropriate pre-drilled holes. This is where a firm base would have been more useful as the bark chippings gave way as the dowels were hammered home. Once the dowels were in place the base was re-levelled so layer 1 now looked like this.

The second layer of blocks fitted remarkably easily over the dowels locking the blocks into place. A couple of blocks needed a final knocking into place with my lump hammer to ensure a snug fit. My piece of timber came in useful to protect the blocks from any damage from hammering directly on the blocks.

The two completed layers now looked like this and it was a question of repeating the process of fixing in more dowels and adding another layer of blocks. The process was easier now as my slightly soft base of bark chippings didn't move as much now the base blocks were locked in position.

It didn't take long to get all 4 layers of blocks fixed and the corner plates added to the top layer. The soft plastic dowels then need cutting three grooves down each one to allow the final capping layer to be added. The dowels were very easy to cut so this didn't take too long and the capping blocks were added to finish of the raised bed.

I have to say I was impressed by the ease of construction. I had a couple of blocks that needed a bit of hammering to get them into place but there wasn't any major problems putting the raised bed together. The instructions were easy to follow and it was simple to cross check with the plan that the dowels were in the correct holes and the shape and position of each block was correct for all the layers as each layer has its own diagram.
I've had far more serious issues with flat pack furniture than this raised bed. The quality is very good and I'm expecting years of use out of this new feature in our gradually coming together coldframe courtyard.


I'm new at blogging, so will try to comment again. Thank you so much for the very interesting post on the making of a cold frame. We have an acre of land in western part of Kentucky and the winters can be quite cold. You have inspired me to invest in a cold frame...you made it look simple!
ReplyDeleteThe finished result looks fabulous, really smart! It's always nice to see if something fits together well - your post makes me think that I could manage to build one of these. I'd love a narrow wall of these beds around my veg patch island, the only stumbling point would be the cost!
ReplyDelete